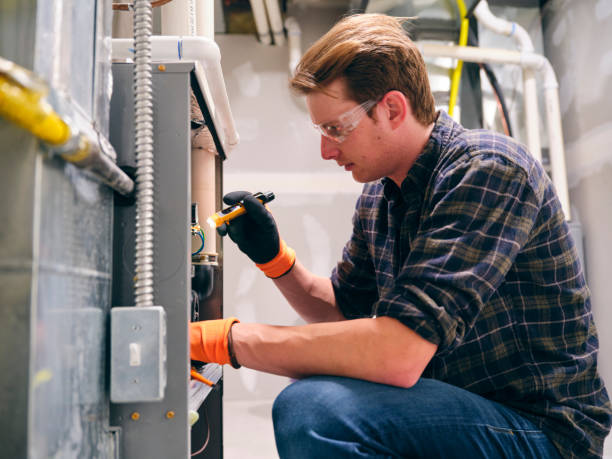
My life experience has shown me that if you can break projects down into basic phases, you will become the project’s master. That is the distinction between a wise and a smart individual.
After that, let’s have a look at how to do HVAC Installation in Scarborough either new or used the smart way. I’ve simplified the process down into 13 simple steps. Will this article teach you everything I know? Obviously not. Throughout my career, I’ve installed thousands of furnaces. You will, however, be aware of the procedure.
Step 1: Make a tool list. Nothing is more aggravating than getting started on a furnace project only to discover you are lacking some of the necessary tools. Most of the essential tools you’ll need are already in your possession. Screwdrivers, drills, hammers, and other tools are examples. I’ll assist you in making your list so that you have everything you need before you start working on HVAC Installation.
Step 2: Evaluate your residence. Suppose you are living in Scarborough and you need HVAC Installation in Scarborough. You’ll need to know how your house is constructed and insulated. Are your windows and doors modern or old? Is there any air leaking into your home through dryer vents, window fans, or other means? Is your house on a concrete slab or does it have a basement? In order to install the proper equipment in your home, you’ll need to know this.
Step 3: Examine the heating and cooling system as well as the ductwork. This is the most crucial stage. Why? You might be surprised by the response. Some HVAC contractors may be surprised. The equipment must be appropriately sized. Without a doubt. There are no exceptions. Why? “Doesn’t the axiom ‘the bigger the better’ apply here?” you might wonder. No. No, no, no, no, no, no, no, no, no, no, no, no, no, no
I’ll give you an example right now. If you had an over-sized air conditioner installed in your home, it would only run for a few minutes until the thermostat was set to the proper temperature. Great! By operating for a short time and bringing the temperature down quickly, the larger A/C saved me energy! What exactly is the issue here? Yes, you cooled your house swiftly, but you failed to remove the humidity (water in the air) from it. The more water an air conditioner extracts from the air, the longer it runs. In hot weather, the excess water in the air makes you feel uneasy. The goal is to make you feel at ease. Quickly cooling the house will have the opposite impact. A furnace works on the same basis. It has to be the right size. There are numerous free online heating and cooling calculators available. Just type in ‘heating and cooling load calculator’ into Google. In most cases, instructions are included. One of them is included in “The Ultimate HVAC Installation Guide,” which I wrote. That heat/load calculator was available for free on the internet.
Step 4: Create a materials list. Ductwork. When you go to the store, keep a running list of the materials you’ll need (for all materials). Perhaps the size of the return should be increased. You’ll almost certainly need to connect the old ductwork to the new furnace. The furnaces installation instructions will inform you what sizes you’ll need for a suitable installation. All of this is part of Step 3.
Step 5: Inventive+ Imaginative+ Imaginative+ Imaginative+ Imaginative+ As you examine your property in step 3, you’ll be able to figure out what your new electrical requirements are. Make a thorough list. Keep in mind that a ground wire is required for all new furnaces. If your old power supply doesn’t have a ground wire, you’ll have to add one.
Step 6: Make a list of the materials you’ll need for the gas line. Step 3 will also determine this. Hopefully, you can understand how important it is to follow this method step by step. Making these lists before you begin the HVAC Installation process will save you time and effort in the long run. You won’t find yourself on the third day of the installation, in minus 10 degrees, having to run to 15 different stores because you don’t have all of the necessary materials on hand, as well as a plan of action.
Step 7: Make a Miscellaneous Materials List. The sort of furnace you have or will purchase will impact this. For example, a furnace that is 80% efficient will require different flue pipe materials than a furnace that is 90% efficient.
Step 8: Locate local vendors for HVAC Installation in Scarborough with whom to collaborate. This could be the most difficult obstacle you face. In the past, you were somewhat reliant on your local vendors. You now have access to the internet. Utilize it to your benefit. A Google search for the phrases “furnace Goodman” will yield a startling amount of results. Always remember to inquire about the warranty. Remember that purchasing your own furnace saves you thousands of dollars, even if you hire a professional to install it for you!
Step 9: Turn off the electricity and shut off the fuel feed to your existing equipment. Yes, I understand, but some people jump right into tearing things apart and entirely overlook this stage. It’s a gentle reminder.
Step 10: Place your existing ducting in its proper location. Why? Nothing is more devastating than starting to remove a furnace only to have the current ducting collapse at your feet. Not only does this add another day to your employment, but it also expands your vocabulary with new four-letter words. As a result, Step 10 involves using cleats and screws to secure the existing ductwork.
Step 11: Dispose of old equipment. You’re ready to start removing the old equipment now that you’ve switched off the furnace’s power and secured your ducting. Remove it from your workspace and place it to the side.
Step 12: Reassembling everything. There are six sub-sections in this section.
The furnace is being aligned. If done correctly, you will be able to reduce the amount of effort and ducting required.
Connecting the new furnace’s Return and Boot
Connecting the old plenum (the ducting that exits the old furnace) to the new furnace. This is referred to as the Transition.
Testing for leaks and reconnecting the gas line
Flue pipes are being run to remove the spent fuel gases.
The thermostat and the high-voltage power supply have been reconnected.
Step 13: Get your equipment up and running. Typically, the manufacturer’s instructions will specify how the new furnace should be turned on and tested. As closely as possible, follow their recommendations.
That is all there is to it. Twenty years of expertise condensed into 13 simple steps. I hope this information is useful to you if you are considering building your own furnace. This article is for all not only for those who want HVAC Installation in Scarborough.


